How to Master Lost Wax Casting Techniques for Perfect Results
Lost Wax Casting has long been a revered technique in the world of metalworking, celebrated for its ability to transform intricate designs into stunning artifacts. As renowned casting expert Dr. Emily Hartley once stated, “The essence of Lost Wax Casting lies not only in its precision but also in the artistry of the process.” This method allows artisans to harness their creativity while ensuring that each piece retains the desired detail and finesse.
Mastering Lost Wax Casting techniques is essential for achieving perfect results, whether you are an experienced metallurgist or a passionate beginner. The process involves creating a wax model, which is then encased in a mold and heated to eliminate the wax, leaving behind a cavity for molten metal. Understanding the nuances of this technique can unlock endless possibilities in jewelry design, sculpture, and other forms of metal art.
Throughout this guide, we will delve into the intricacies of Lost Wax Casting, exploring best practices, common challenges, and expert tips to ensure that your creations are not only technically sound but also artistically exceptional. Join us on this journey to master Lost Wax Casting and reveal the full potential of your artistic vision.
Understanding the Basics of Lost Wax Casting
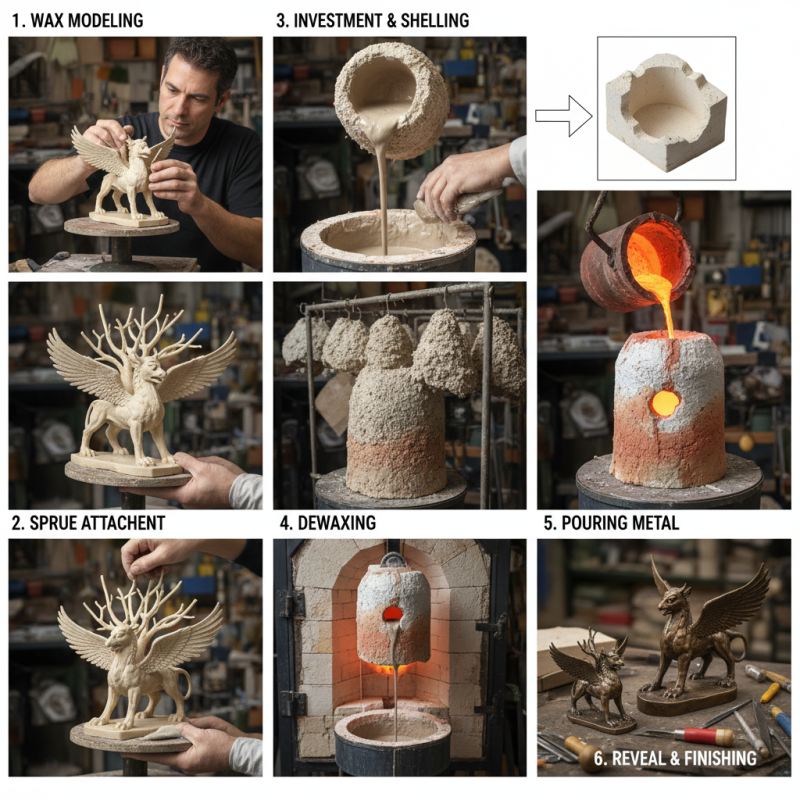
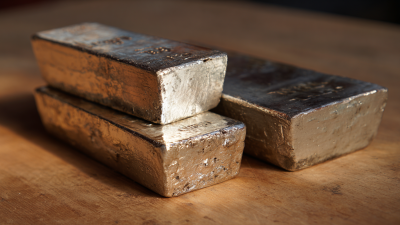
Lost wax casting, also known as investment casting, is a time-honored technique that has been employed for centuries to create intricate metal objects. The process begins with the creation of a wax model, which is coated in a ceramic shell. Once the shell is hardened, the wax is melted away, leaving a hollow mold for the molten metal to fill. This method allows for exceptional detail and precision, making it a popular choice among jewelers and sculptors. According to a report by Markets and Markets, the global investment casting market is expected to reach USD 25.4 billion by 2026, highlighting the increasing demand for this technique in various industries, from aerospace to art.
Tips: To achieve the best results in lost wax casting, ensure the wax model is free from imperfections and fully detailed, as any flaws will transfer to the final product. When preparing the investment material, selecting the appropriate mixture according to the metal being cast is critical. A well-calibrated kiln temperature and controlled cooling rate can significantly influence the quality of the casting.
Understanding the basics of lost wax casting involves recognizing the importance of material selection and mold preparation. The wax's melting point and the investment's strength are key factors that must be optimized to prevent failures during the casting process. Data from the American Foundry Society shows that proper mold design can enhance the flow of molten metal and reduce defects, showcasing the precision required in the early stages of this ancient technique. By mastering these foundational aspects, artisans can elevate their work and ensure stunning outcomes.
Essential Tools and Materials for Lost Wax Casting
Lost wax casting is a time-honored technique that requires precision and the right materials to achieve flawless results. The essential tools for this process include a wax model, a flask for molding, and a heat source for melting the metal. A recent industry report indicated that approximately 70% of jewelers advocate for high-quality wax that has a low melting point, allowing for more intricate designs and less shrinkage during the casting process. Additionally, using vacuum pumps during the curing phase can minimize air bubbles, which significantly impacts the final product's quality.
In terms of materials, the choice of metal is crucial. According to the Jewelry Industry Statistical Report, over 60% of jewelers prefer using bronze and silver for lost wax projects, as these metals provide a favorable balance between malleability and strength. Moreover, investing in reliable investment materials, like silica or phosphate-based powders, ensures optimal mold integrity. This is essential, given that molds that maintain their shape can yield precision details and reduce the need for excessive post-casting adjustments. By understanding and utilizing these essential tools and materials, artisans can enhance their mastery of lost wax casting and produce stunning, professional-grade results.
Mastering Lost Wax Casting Techniques - Tool and Material Usage
This chart illustrates the usage percentage of essential tools and materials in the lost wax casting process. Understanding the importance of each element can help achieve perfect results.
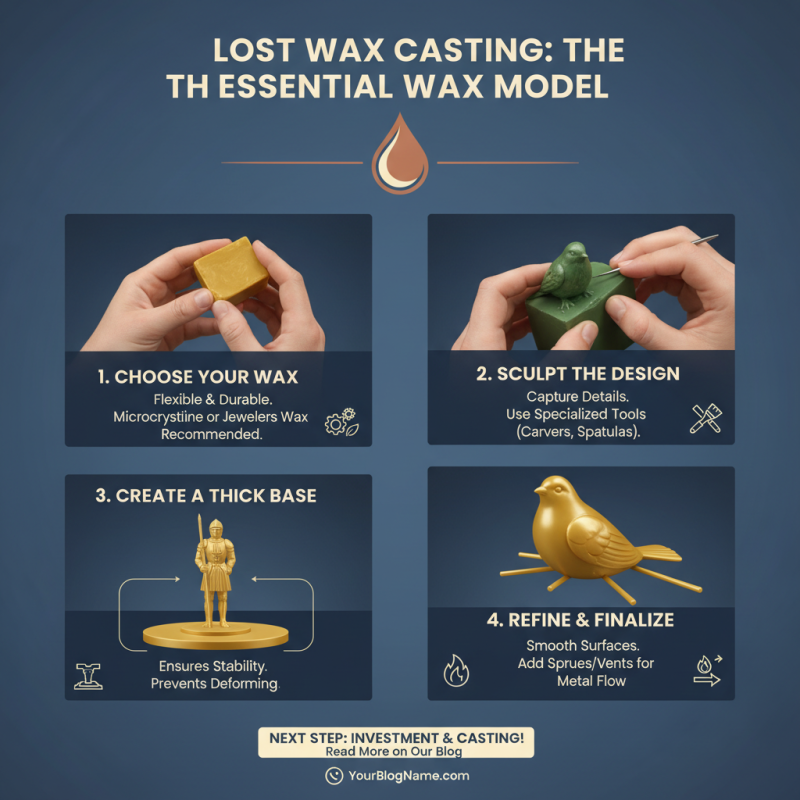
Step-by-Step Process of Creating a Wax Model
Creating a wax model is an essential step in the lost wax casting process, allowing artisans to capture intricate details before forging metal. Start by choosing the right type of wax; it should be flexible yet durable for shaping. Begin by sculpting your design, using tools that suit the level of detail required. Remember to make a thick base that provides stability to your model, especially if it’s complex.
Once your wax model is complete, ensure that all surfaces are smooth, as imperfections will transfer to the final casting. At this stage, consider applying a wax lubricant to prevent any sticking during the mold-making process. Additionally, it’s crucial to take accurate measurements and proportions throughout your modeling to ensure a good fit in the final product.
Tips for successful wax modeling include working in a temperature-controlled environment to maintain wax consistency, and using a heat source like a warmed knife to make clean cuts and alterations. Practice patience, allowing time for fine-tuning your model’s features. With precision and careful planning, your wax model will serve as a perfect foundation for achieving outstanding results in lost wax casting.
Making the Mold: Techniques and Best Practices
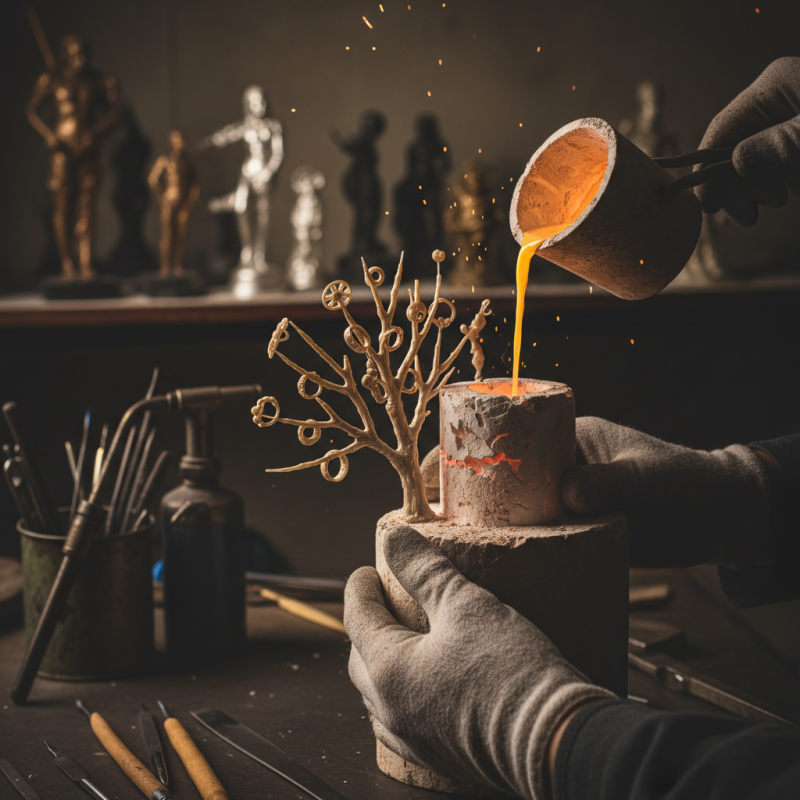
Creating a mold is a crucial step in mastering lost wax casting techniques. The first consideration is the material used for the mold. Common choices include plaster, ceramic, or various high-temperature compounds that can withstand the molten metal. To start, measure the wax model carefully and create a mold box that will contain the mold material. Coating the wax model with a release agent is essential to prevent the mold from sticking. Once the model is prepared, the mold material should be mixed according to the manufacturer's instructions and poured over the model, ensuring it encompasses all details. It's important to tap the mold gently to eliminate any bubbles that might compromise the final product.
After the mold has set, attention turns to the proper finishing techniques. Carefully demold the wax model to prevent any damage, and examine the mold for imperfections. If needed, minor adjustments can be made using fine tools or sandpaper. Additionally, multiple mold sections should align perfectly to ensure a seamless final piece. Before pouring the metal, preheating the mold can also help in achieving a better flow and reducing the risk of defects. Understanding these best practices in mold making forms the foundation of achieving flawless results in lost wax casting, transforming intricate designs into beautiful finished pieces.
Finishing Touches: Polishing and Finalizing Your Castings
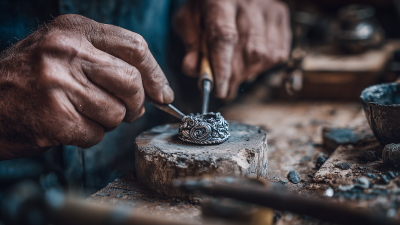
Finishing a lost wax casting involves several essential steps to ensure that the final piece is not only beautiful but also showcases the fine details achieved during the casting process. The first step in the polishing procedure is to carefully remove any excess material, such as sprues or gates, that were part of the casting process. This can often be done with a metal saw or cutter, depending on the thickness of the remnants. Once these have been removed, the surface of the piece may still exhibit rough spots or imperfections, which can be addressed through sanding. Utilizing a range of sandpapers—from coarse to fine—will progressively smooth the surface. It's crucial to follow the contours of the design to maintain the integrity of intricate details.
After sanding, the piece can be polished to a brilliant shine. This often involves using a polishing compound along with a soft cloth or a mechanical polisher. For more delicate designs, a hand-held approach is recommended to avoid inadvertently altering the piece's shape. Additionally, for those looking to enhance the visual appeal further, techniques like tumbling or using a buffing wheel can yield excellent results. Applying a protective coating or wax afterward can also help preserve the finish while providing a layer of protection against tarnishing or scratching. Each of these finishing touches not only improves the piece’s aesthetic but also adds to its durability, ensuring that the artistry captured during the casting process remains intact for years to come.
How to Master Lost Wax Casting Techniques for Perfect Results - Finishing Touches: Polishing and Finalizing Your Castings
| Step |
Description |
Tools Required |
Duration |
| 1 |
Remove the wax from the mold carefully. |
Wax removal tools |
30 mins |
| 2 |
Clean the cast with a degreasing solution to remove any residues. |
Degreaser, brush |
15 mins |
| 3 |
Polish the surface using fine sandpaper for a smooth finish. |
Sandpaper, polishing compound |
1 hour |
| 4 |
Apply a buffing compound to enhance shine. |
Buffing wheel, compound |
30 mins |
| 5 |
Inspect for defects and make any necessary adjustments. |
Magnifying glass, additional tools |
30 mins |